Learning how to make soy milk is much simpler than you might think.
Homemade soy milk is free from preservatives and additives and is perfect for drinking, fermenting, or creating tofu.
The leftover fiber, known as okara or u no hara, can be dried or frozen for cooking or used as fertilizer.
Here is a step-by-step guide to making soy milk at home!

Jump to:
Soy milk is a nutritious option if you are avoiding dairy. You can use it in baking for tasty dairy-free breakfasts, like a breakfast casserole or savory vegan muffins.
In drinks, you can whip up delicious and healthy treats, such as tofu smoothie recipes. You can also make dairy-free dessert fillings, like eggless lemon curd, using soy milk.
Homemade soy milk is not just fantastic for cooking; it is also a delicious, healthy drink. It is free from preservatives and super simple to make.
Learn how to make soya milk, it's so easy to make, healthy, and budget-friendly. It is a great dairy-free alternative and tastes delicious.
Why You Will Love This Recipe
- Making soya milk at home is easy.
- It is better for you because it does not contain preservatives or additives.
- Fresh soya milk is not just for drinking; you can use it to make tofu, yogurt, and cheese too.
- And it is cheap! We only spent $0.80 to make 3 liters (6.3 pints) of soya milk.
- If you can not have or do not want dairy milk, this is a good alternative.
- Just remember to soak the dried soy beans for at least 4 hours or overnight before using.
- Soy milk is good for many different diets like vegan, vegetarian, gluten-free, or dairy-free.
- And you do not need any special machines to make it, just basic kitchen stuff.
Cost to Make
Estimated cost = $0.80 for 3 liters or about $0.07 a cup
Ingredients
Please note that below is a guide for some of the ingredients we used in the recipe. The printable recipe further down the page has the complete list of ingredients, including quantities and step-by-step instructions.

Soya beans - For this recipe, all you need are yellow dried soybeans and water to create unsweetened soya milk.
Sugar (optional) - If you prefer sweetened soya milk, you can customize it by adding sugar, honey, maple syrup, or another alternative to suit your taste.
Equipment
A food processor or blender - is essential for blending and breaking down the soaked beans to create soya milk.
A sieve and muslin cloth (cheesecloth) - are used to strain out the pulp from the blended beans, resulting in smooth soya milk. Alternatively, a nut milk bag can also be used for this purpose.
We typically use a piece of muslin cloth measuring about 70 cm (27.5 inches) x 86 cm (34 inches), folded in half to create a double layer.
After use, the cloth is washed and dried for future use.
4-liter (4.22 quart) saucepan - This size of saucepan is necessary because the recipe yields approximately 3 liters (6.3 pints) of milk.
If you don't have a saucepan of this size, you can use a smaller one and cook the milk in batches.
Instructions
Soak the beans
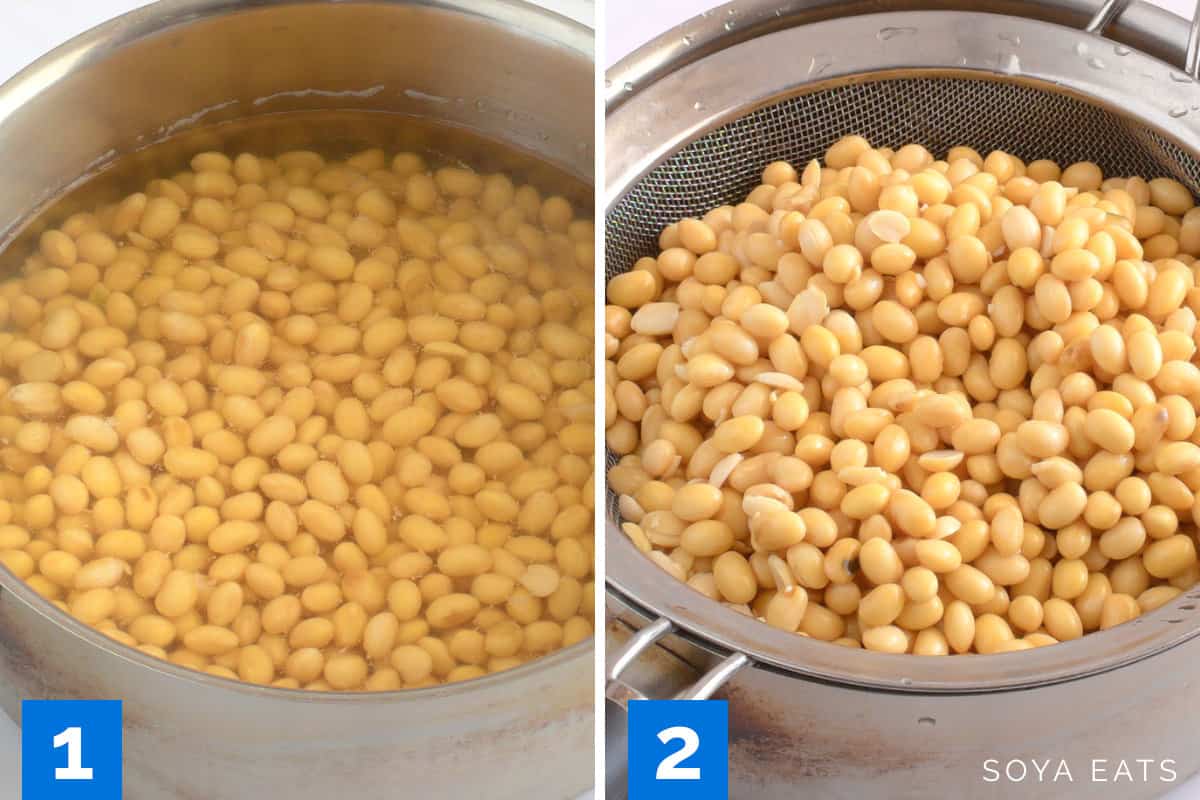
Image 1 - Start by placing the beans in a large container. Give them a good wash, rinse them twice, and then drain them thoroughly.
Once cleaned, cover the beans with water, ensuring they're submerged about 5 - 7 cm (2 - 2.75 inches) below the water's surface.
It is important to add extra water as the beans will expand during soaking, roughly doubling in size.
Cover the container with a clean cloth and let the beans soak for 4 hours or overnight.
You can leave them at room temperature or, during hot weather, store them in the fridge.
Image 2 - After the soaking period, transfer the beans to a strainer to rinse and drain off excess water.
Take a moment to inspect the beans, removing any that appear damaged or discolored.
Blending

Image 3 - Work in batches by placing half of the beans or less into the blender.
Pour in a portion of the water as specified in the recipe ingredients, ensuring the water level is above the beans for smooth processing. Blend for 30 - 40 seconds.
Depending on the size of your blender, you may need to process the beans in two or more batches.
Image 4 - Be careful not to overfill the blender, as the liquid tends to froth and rise while processing the soya beans.

Image 5 - Once blended, carefully pour the liquid into a clean container. Repeat the blending process with the remaining beans.
After blending all the beans, rinse the jug with water to remove any remaining pulp. Pour this rinsed water into the bowl with the soya milk.
Filter
Prepare a filtering station by setting up a sieve over a bowl or large saucepan. Line the sieve with a double layer of muslin cloth.
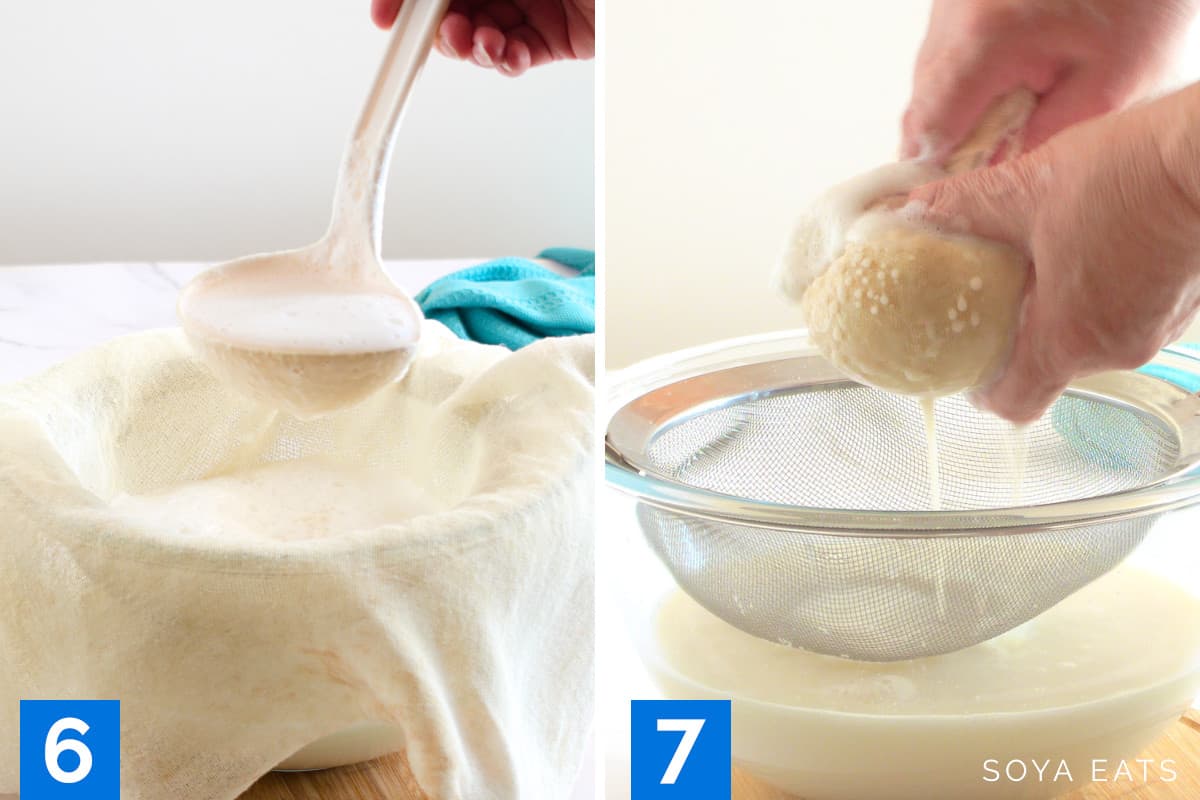
Image 6 - In batches, pour some of the liquid through the muslin-lined sieve, allowing it to drain into the saucepan.
Image 7 - Between batches, squeeze out the moisture from the pulp by gathering the ends of the muslin cloth and twisting it into a sack. Then, squeeze out any remaining liquid from the pulp.
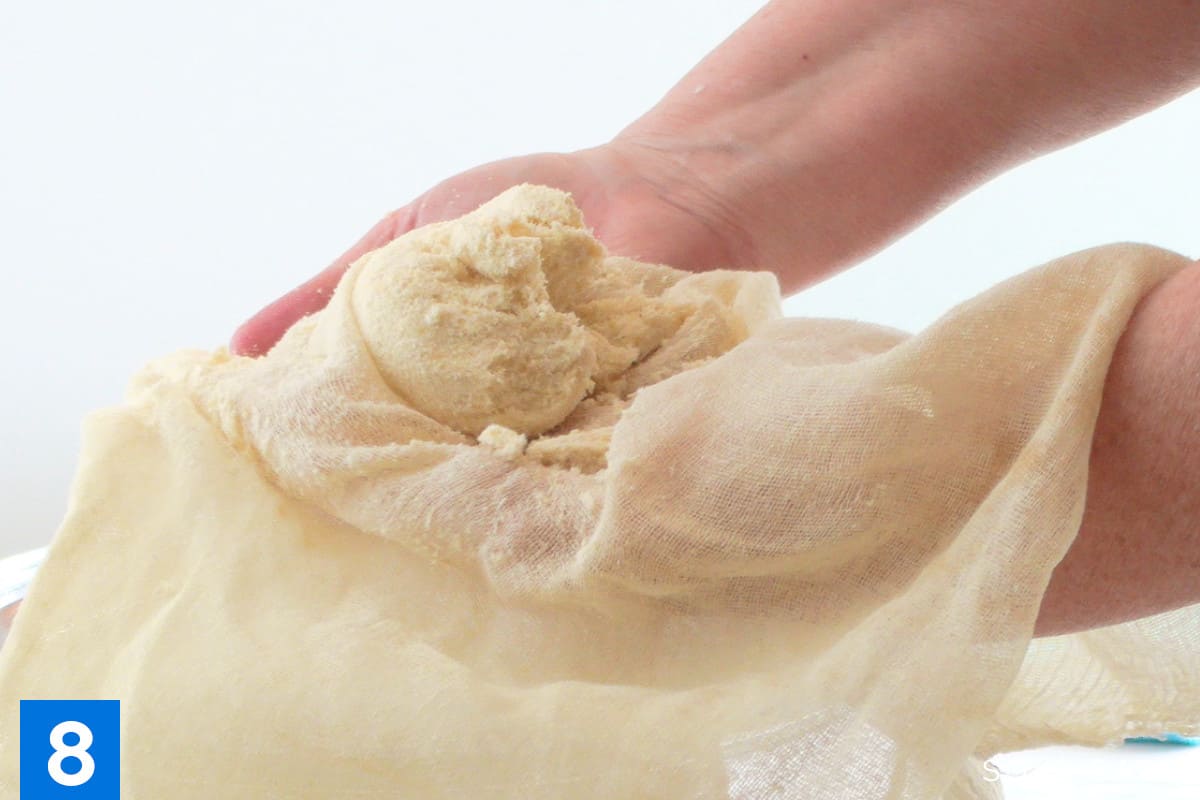
Image 8 - After squeezing, remove the pulp from the muslin cloth, preparing it for the next batch.
Heat the milk

Image 9 - Once the soya milk is filtered, transfer it to a large saucepan and add all the remaining water (you should have used up all 3 ½ liters / 14 cups of water by this point).
Place the saucepan containing the soya milk over medium to high heat and bring it to a boil. Stir the milk occasionally to prevent it from sticking and burning.
As the milk heats up, skim off and discard any foam that appears on the surface. It is important to keep a close eye on it and not let it boil over.
Continue stirring the milk intermittently to prevent it from sticking to the bottom of the pot.
Once it reaches a boil, reduce the heat to low and let it simmer for about 10 - 15 minutes. Then, remove it from the heat and allow it to cool.
Sweeten (optional)
You can choose to leave the soya milk unsweetened or add sweetness depending on your preference.
To sweeten the soya milk, mix in your desired sweetener while the milk is warm.
Start by adding small amounts of sweetener and taste the milk in between additions until you reach your desired level of sweetness.
Recipe Tips
- Start with Good Beans - Get the best-dried soya beans you can find and use fresh water for tastier soy milk.
- Soak Well - Make sure to soak the beans for at least 4 hours or overnight. This makes them soft and easier to blend.
- Blend in Batches - If needed, blend the soaked beans with water in smaller batches. This helps get a smooth mix.
- Strain Carefully - Use a strainer with a muslin cloth to separate the milk from the bean bits. Gently press to get all the milk out without forcing too much pulp through.
- Boil Slowly - Heat the soy milk gently until it boils, stirring sometimes to keep it from sticking to the pan.
- Remove Foam - When it starts to boil, you might see foam on top. Use a spoon to take it off and keep the milk smooth.
- Add Sweetness - If you like, you can sweeten your soy milk with things like sugar or vanilla. Mix them in after straining while the milk is still warm.
- Store Well - Keep your homemade soy milk in a clean, sealed container in the fridge. Give it a good shake before using it as it might separate.
- Use Leftovers - Don't throw away the leftover pulp (okara)! You can use it in recipes like muffins or pancakes for extra flavor and nutrition.
Soya Bean Pulp

Soya bean pulp, also known as okara, is a versatile ingredient that can enhance various recipes.
With its high fiber, protein, and nutrient content, it's a fantastic addition to your daily diet.
Here are some creative ways to use okara: muffins, pancakes, bread, patties, tempeh, and cookies.
Keep in mind that the soya bean pulp from this recipe requires cooking before consumption especially when making uncooked dishes like salads.
Check out our post on "What To Do With Soy Bean Pulp" for tips on cooking raw okara.
Also, explore our article "What is Okara?" for more inspiration on how to incorporate it into your cooking.


Serving Size
A serving size is 250ml (8.5 ounces) cup of soy milk.
Calories Per Serve
There are about 80 - 100 calories in one cup of unsweetened soya milk.
Serving Suggestions
Vanilla Soy Milk
- Add ½ teaspoon of vanilla extract (adjust to taste) to one cup of soya milk. If using unsweetened soya milk, sweeten it to your liking with your preferred sweetener.
Chocolate Soya Milk
- Put a tablespoon of cocoa powder into a cup, add a small amount of soya milk, and mix well. Then, fill the cup with more soya milk. Stir thoroughly and sweeten according to your taste.
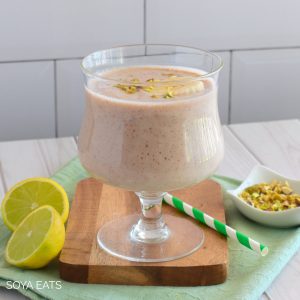
Smoothies and Milkshakes
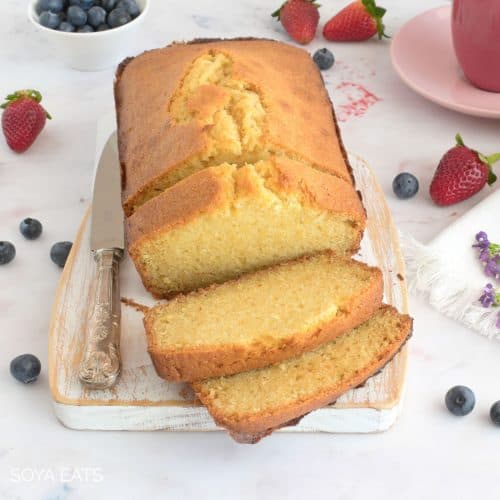
- Substitute dairy milk with soya milk in recipes like this watermelon smoothie.
You can make:
- Tofu
- Tofu fa or douhua (tofu custard)
- Use it to make cheese, like soya milk cottage cheese and soya milk ricotta.
- You can use it like dairy milk in any recipe like this banana chia pudding, or this dairy free custard, milkshakes, smoothies, ice cream, and baking.
- You can even use it to make sweetened condensed soy milk.
Storage
This fresh milk will only last for about 3-4 days because it is preservative-free and must be kept in the fridge.
If it begins to thicken, it is in the early stages of going off, and if it smells and tastes sour, it has gone off and must be discarded.
No, it tends to separate when frozen, and the consistency changes.

Feel inspired to try making your soy milk at home. Share your thoughts in the comments below!
If you want to keep this soy milk recipe handy for later, don't forget to pin it!
Recipe

How To Make Soya Milk
Equipment
- Food processor or blender
- Sieve and muslin cloth
- 4 liter (4.22 quart) saucepan
Ingredients
- 275 grams (9.7 ounces / 1 ½cups) dried yellow soya beans
- 3 ½ liters (14 cups) of water + extra water for soaking
Optional
- Sugar or alternative add to taste
Instructions
Soak the beans (minimum 4 hours or overnight)
- Place the beans in a container, wash and rinse the beans twice and drain well.
- Fill the container with enough water to cover the beans so that the water level is about 5 - 7 cm (2 - 2.75 inches) above the surface of the beans. Cover the container with a lid or clean cloth and soak the beans for at least 4 hours or overnight.
Make the soya pulp
- Drain the soaked beans and discard the soaking water.
- Pick through the beans, and remove and discard any beans that look bad.
- Measure 3 ½ liters of water and put it aside for the next steps.
- Working in batches, place half of the beans or less into a food processor, and pour in some of the measured water from step 3. The water level should be well above the beans to ensure an easy processing blend for 30 - 40 seconds. NOTE: Depending on the size of the food processor you have, you may have to process the beans in two or more batches. You don't want to overfill the food processor because the liquid will rise and froth up as the soya beans are processed.
- After processing, strain the mixture by pouring it into a sieve lined with a muslin cloth placed over the top of a large saucepan to catch the soya milk.
- Gather the ends of the muslin cloth and twist it into a sack and squeeze out any remaining liquid from the pulp. Discard the soya bean pulp and return the empty muslin cloth to the sieve. NOTE: The soya bean pulp can be discarded or you can keep it to make other recipes.
- Repeat steps 4 - 6 until all the beans are processed. Rinse out the jug after the final batch with more of the water and pour this into the muslin cloth with the last lot of processed soya beans.
- Pour the remaining water into the saucepan with the soya milk.
Cook the milk
- Place the saucepan with the soya milk over medium/high heat and bring to a boil. Stir the milk from time to time to prevent burning.
- Skim and discard the froth as it appears on the surface of the milk and don't walk away from it because it can boil over.
- As soon as it comes to a boil turn it to low and simmer for about 10-15 minutes, stir every so often, turn off the heat and allow it to cool.
- The soya milk can be left unsweetened or sweetened. For sweet soya milk, it is best to add a sweetener or your choice when the milk is warm.
Cool and store
- Allow the milk to cool, then transfer the milk to a bottle or other airtight container and store it in the fridge. It won't keep for that long and should be consumed within 3- 4 days.


Erin says
This is by far one of the easiest ways to make soya milk! It has saved me so much time and effort. Thank you!
Martha W says
You should be able to pour the boiled soy milk directly into sterilized jars with sterile lids, so it will keep considerably longer in the fridge.
It would be hard for me to get through 3 litres in 2-4 days!
(OR, I could halve the recipe, of course.)
Thanks for this information.
Harriet Britto says
I haven't tried pouring the boiled soy milk into sterilized jars so I can't say if it will extend it shelf life. If you do try it, I would love to know how it went.