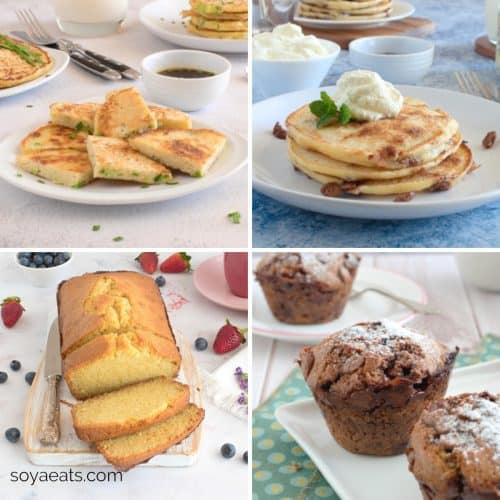
Learn how to make delicious homemade okara bread with this easy recipe!
Whether you prefer a classic loaf or savory dinner rolls, you can customize this recipe to suit your taste.
Follow along as we guide you through each step, from mixing the ingredients to baking this delicious bread.

Jump to:
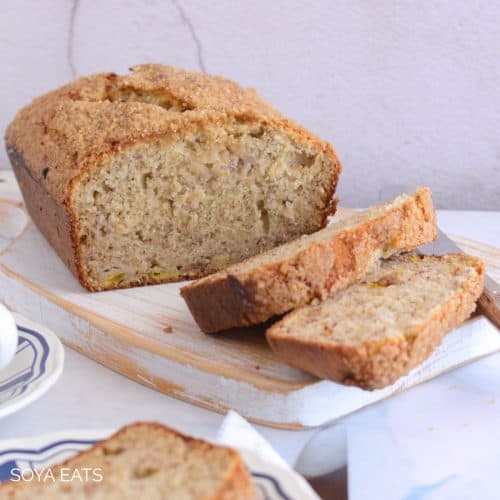
There are plenty of reasons why you will love this okara bread recipe. Firstly, it creates soft, delightful white bread that is simply delicious.
Picture biting into a fluffy slice – it is like tasting a bit of heaven!
And it is incredibly easy to make, ensuring you can enjoy fresh bread without any worry or hassle.
This bread is perfect for sandwiches. Imagine layering your favorite fillings between slices of this soft bread – it is like fulfilling your ultimate sandwich dream!
And let us not forget the amazing smell it fills your home with as it bakes. Nothing beats that cozy, comforting aroma of fresh bread wafting through the air.
Plus, it is a budget-friendly recipe and a fantastic way to reduce food waste. Instead of throwing away soybean pulp (okara), you are turning it into something delicious just like this okara hummus style dip.
Why You Will Love This Recipe
- This recipe makes bread that is soft and delicious. You will love every bite!
- It is simple and does not take much effort. No need to stress about complicated steps!
- This okara bread is just right for making sandwiches. Put your favorite fillings between slices and enjoy a tasty meal.
- Instead of throwing away leftover soybean pulp (okara), you can use it to make this bread. It is a smart way to make the most out of your ingredients and reduce waste.
- Making this bread won't cost you much. It is a budget-friendly option for having fresh, homemade bread.
Cost to Make
Estimated cost = $2.70 a loaf or about $0.23 a slice
What is Okara?
Okara is the leftover pulp from making soy milk or tofu, known as a Japanese term.
It is packed with fiber, calcium, protein, and other minerals, making it a healthy ingredient for various dishes.
While fresh okara is commonly found in Japan, Korea, and China, it is not as easily available elsewhere unless you make soy milk or tofu at home.
If you are curious about using okara, check out our helpful article on "What To Do With Soya Bean Pulp," where we discuss how to cook, store, dry, and even turn it into a powder.
For more insights into okara, you can also read our post "What Is Okara?"
Can You Eat Uncooked Okara?
To know if okara is safe to eat, it is important to know where it comes from: if it was made from cooked or uncooked soybeans.
You can figure this out by understanding how it was used when making soy milk.
There are two methods of making soymilk:
- One method is to grind soaked uncooked beans, squeeze the milk from the pulp, then heat the pulp free milk for safety. The raw okara from this method requires cooking for dishes like salads but can be used in recipes that involve cooking, to ensure safety.
- The other method is to cook soaked beans in water, then grind and extract the milk from the pulp. Okara from this method is already cooked and safe for use, especially in cold dishes.
If there is any uncertainty about how it was made, it is best to cook the okara to ensure safety.
If you are using powdered okara, it has already been cooked and is safe to use in cooking.
Tips for Bread Making With Okara
Drain okara well - If you are using okara from homemade soy milk, make sure to drain it well to remove excess moisture. Excess moisture can affect the texture of your baked goods.
Cook okara before baking - Raw okara should be cooked before using it in bread making.
It removes any raw taste, reduces moisture content, deactivates enzymes that can affect the yeast, neutralizes acidity, and improves texture.
See the recipe instructions for how to cook fresh raw okara.
Adjust moisture levels - Okara can vary in moisture content, so be prepared to adjust the moisture levels in your bread recipe.
Hold back some of the liquid and add a little more if needed.
Combine with other flours - Okara can be combined with other flours like whole wheat flour or oat flour to create a more balanced texture in your baked goods.
Store properly - If you have leftover cooked okara, store it in an airtight container in the refrigerator and use it within a few days.
Alternatively, you can freeze okara for longer-term storage. See our post on what to do with soybean pulp to learn more.
Ingredients
Please note that below is a guide for some of the ingredients we used in the recipe. The printable recipe further down the page has the complete list of ingredients, including quantities and step-by-step instructions.

Fresh Okara - This is the leftover pulp from making homemade soy milk. It gives the bread a unique texture and adds nutritional value.
Butter - Adds rich flavor to the bread and helps keep it moist. Without butter, the bread might lack some richness.
Salt - Essential for flavoring the bread. It brings out the taste of other ingredients. If you skip salt, the bread might taste a bit plain.
Sugar - Sweetens the bread slightly, balancing out the flavors. It also helps with the bread's texture and browning during baking.
Bread Flour - Provides the structure and texture of the bread. Using bread flour ensures a soft and fluffy consistency.
Dry Instant Yeast - Helps the bread rise quickly without the need for proofing. It \'s essential for achieving that light and airy texture.
Warm Milk - Activates the yeast and adds moisture to the dough. Using warm milk instead of cold liquid helps the yeast work faster and creates a softer dough.
Equipment
- Stand mixer
- Kitchen scales
- Metric measuring spoons
- Bread tin 25cm (L) x 11.5cm (W) x 10cm (h) (10 x 4.5 x 4 inches)
- Cake rack
Kneading The Dough
This bread recipe is written for a stand mixer, but you can also knead the dough by hand or in a bread machine if you prefer.
Instructions
Advanced prep

Put the fresh okara in a dry pan on low to medium heat. Stir it often for around 5 minutes so it doesn't burn.
Or, you can spread the okara on a plate that's safe for the microwave and cook it on high for 3 minutes.
Let it cool down completely before you use it.

Step 1 - Into the bowl of a stand mixer place the butter, salt, sugar, bread flour, okara, instant yeast, and almost all of the milk.
Note: The amount of milk you use will vary on how wet your okara is, so always add less than you think you need and check the dough after a few minutes of kneading.

Step 2 - Attach the dough hook, and start the machine at low speed to combine all the ingredients.
Increase the speed to medium and knead for about 2 minutes, in that time if the dough feels a little dry, add a touch more milk.
Continue to knead the dough on medium speed for another 5 minutes or until the dough has come away from the sides of the bowl.

Step 3, 1st rise - Remove the bowl from the stand mixer, and cover the bowl with plastic wrap or a dry clean towel.
Place the bowl in a warm area and allow the dough to rise and double in size, this can take anywhere from 1 - 3 hours depending on your room temperature.
Grease and flour the inside of a 25cm (L) x 11.5cm (W) x 10cm (h) (10 x 4.5 x 4 inches) bread tin.

Step 4, shape the bread - When the dough is ready, turn it out onto a lightly floured surface, use your hands or a rolling pin, to roll the dough into a large rectangle about 8 x 15 inches (20 x 40cm). Roll the dough into an 8-inch (20cm) log and place it into the prepared tin seam side down.


Step 5, 2nd rise - Cover the tin with a clean cloth and allow the bread dough to rise to about 1 inch above the top of the bread tin.
Place the oven rack low down in the oven and preheat the oven to 180°C (350°F).
Step 6, Bake - Bake the bread for about 30- 35 minutes or until the top is golden brown on top.
If the bread looks like it is browning too quickly loosely cover the top with a piece of aluminum foil.
You can tell when the bread is cooked by tapping on the top of the loaf, if it sounds hollow it is ready.

Step 7 - Remove from the oven, and allow the bread to cool in the tin for a few minutes, then transfer to a wire rack and cool completely before slicing.

Serving Size
You can expect to get around 12 slices of bread from this recipe, and one slice is considered a serving.
Calories Per Serve
Each slice of this bread contains approximately 179 calories.

Recipe Tips
Don't use melted butter - Using melted butter can make the dough too wet and affect its texture. Instead, use softened butter at room temperature, which blends better with the other ingredients.
Adjust liquid - Since fresh okara can vary in moisture content, it's best not to add all the liquid at once. Knead the dough briefly, and if it appears too dry, gradually add a little extra liquid until you reach the desired consistency.
Knead well - Just like with any bread dough, it is important to knead the dough well.
This step helps develop the gluten, giving the bread its desired texture and structure.
Proper kneading also distributes the ingredients evenly, ensuring a uniform consistency in the finished bread.
So, take your time and knead the dough until it is smooth and elastic for the best results.
Allow for rising time - Okara bread may take a bit longer to rise compared to traditional bread recipes.
Be patient and allow enough time for the dough to double in size during both the first and second rise.
Test for doneness - when you think the bread is done tap the top of the bread on your knuckle, if it sounds hollow, it is ready. If it still sounds dense or thuds, it needs a little more time in the oven.
Cool completely - Allow the bread to cool completely on a wire rack before slicing.
This helps prevent it from becoming gummy allows the flavors to fully develop and makes slicing easier.
Substitutions
- Instead of butter, you can use margarine.
- If you do not have bread flour, you can use all-purpose flour as a substitute. Keep in mind that bread flour has a higher protein content, which helps give bread its structure and chewiness, so the texture will vary slightly.
- If you do not have dry instant yeast, you can use active dry yeast instead. However, you will need to activate active dry yeast by proofing it warm milk with a bit of sugar before adding it to the dough.
- Instead of warm milk, you can use warm water or plant-based milk such as almond milk, soy milk, or oat milk. Just make sure the liquid is warm to help activate the yeast.
- If you are looking to reduce sodium intake or do not have salt on hand, you can omit it from the recipe. However, keep in mind that salt enhances the flavor of the bread, so the final result may taste slightly bland without it.
- You have the option to swap sugar with alternatives like honey, maple syrup, agave nectar, or any other sweetener you prefer. Make sure to adjust the quantity based on your taste. Also, if you use syrup sweeteners, consider reducing the amount of milk to balance the liquid in the recipe.

Variations
Dinner rolls - If you are not keen on making a whole loaf of bread, you can simply divide the dough into 12 equal portions and shape them into dinner rolls.
The cooking time for the dinner rolls would typically be around 15-20 minutes at the same temperature specified in the original recipe for baking the loaf.
Storage
Room temperature - To store okara bread, wrap it tightly in plastic wrap or aluminum foil to keep it fresh.
You can also place it in a resealable plastic bag or an airtight container.
Store the bread at room temperature for up to 2-3 days.
Refrigerator - In hot and humid climates, it's best to store the bread in the refrigerator to keep it fresh.
Freezing – If you want to keep it for longer, you can freeze it. Slice the bread before freezing to make it easier to thaw individual portions.
To thaw frozen bread, let it sit at room temperature.
FAQ
Yes, okara can go bad if it's not stored properly or if it's left for too long. Make sure to store it in the refrigerator and use it within a few days to keep it fresh.


As you savor the aroma of freshly baked white okara bread filling your kitchen, we hope you have enjoyed this journey into homemade bread-making.
Whether you have followed our recipe step by step or added your twist, we would love to hear about your experience!
Share your thoughts in the comments below, and don't forget to pin this recipe for future baking adventures.
Recipe

White Okara Bread Recipe
Equipment
- Kitchen scales
- Measuring cups
- Measuring spoons
- Stand mixer
- Bread tin 25cm (L) x 11.5cm (W) x 10cm (h) (10 x 4.5 x 4 inches)
Ingredients
- 80 grams (2.8ounces, 1 cup) fresh okara
- 37 grams (1.3 ounces) butter, softened to room temperature but not melted
- 1 teaspoon salt level
- 2 tablespoons white granulated sugar
- 300 grams (10.58 ounces) bread flour
- 1 teaspoon dry instant yeast level
- 160 grams (mls) (5.64 ounces) + 1 tablespoon milk warm
Instructions
Advanced prep
- Cook the fresh okara over low to medium heat in a dry skillet, for about 5 minutes, while stirring to avoid burning. Or, spread the okara onto a microwave oven-safe plate and cook on high for 3 minutes. Put aside and allow to cool completely before using.
Prepare the dough
- Into the bowl of a stand mixer place the butter, salt, sugar, bread flour, okara, instant yeast, and a little over half of the milk.Note: The amount of milk you use will vary on how wet your okara is, so always add less than you think you need and check the dough after a few minutes of kneading.
- Attach the dough hook, and start the machine at low speed to combine all the ingredients.Increase the speed to medium and knead for about 2 minutes, in that time if the dough looks a little dry and is not coming together into a ball, add in a little extra milk. Continue to knead the dough on medium speed for another 5 minutes or until the dough has come away from the sides of the bowl and looks smooth.
- 1st rise - Remove the bowl from the stand mixer, and cover the bowl with plastic wrap or a dry clean towel. Place the bowl in a warm area and allow the dough to rise and double in size, this can take anywhere from 1 - 3 hours depending on your room temperature.
- Grease and flour the inside of a 25cm (L) x 11.5cm (W) x 10cm (h) (10 x 4.5 x 4 inches) bread tin.
- Shape the bread - When the dough is ready, turn it out onto a lightly floured surface, use your hands or a rolling pin, to roll the dough into a large rectangle about 8 x 15 inches (20 x 40cm). Roll the dough into an 8-inch (20cm) log and place it into the prepared tin seam side down.
- 2nd rise - Cover the tin with a clean cloth and allow the bread dough to rise to about 1 inch above the top of the bread tin.
Bake
- Place the oven rack low down in the oven and preheat the oven to 180°C (350°F).
- Bake the bread for about 30- 35 minutes or until the top is golden brown on top. If the bread looks like it is browning too quickly loosely cover the top with a piece of aluminum foil.You can tell when the bread is cooked by tapping onto of the loaf, if it sounds hollow it is ready.
- Remove from the oven, and allow the bread to cool in the tin for a few minutes, then transfer to a wire rack and cool completely before slicing.

Maggie says
Can your muffin and white bread recipe be made with gluten free flour like Bob Red Mills 1 to1 flour?
Harriet Britto says
I have not tried the recipe with gluten free flour, but I think it should work out ok - you might just have a slightly different texture and density to the bread. If you do try it with gluten free flour, I would love to know how it turned out.
Corinne says
This is a lovely, soft bread that I will certainly make again and again. Well done! I'm looking forward to trying many other recipes on your site. Thank you!
Harriet Britto says
Thank you for trying the recipe! I'm so happy you loved the bread. I hope you enjoy trying more of my recipes. Happy baking!