This gluten free okara chocolate cake is a great way to use up the soybean pulp left over from making soya milk. It is moist and chocolaty and easy to make.

Jump to:
This naturally gluten free okara chocolate cake is indulgently rich and fudgy and a great way to use soy pulp left over from making soy milk at home.
Why You Will Love This Recipe
You will love this gluten free okara chocolate cake because:
- This flourless cake is made with six ingredients fresh okara, eggs, cocoa powder, sugar, butter, and milk - use a plant-based milk like soy to make it dairy free.
- It is fudgy and tender and a chocolate lover's dream.
- It is a small batch recipe and serves six.
- If you don't eat gluten free, don't pass this recipe up. Make it the next time you have fresh soy bean pulp because it is one of the best chocolate cakes ever.
Cost to Make
Estimated cost = $2.40 or $0.40 a serve
What is Okara?
Okara is the leftover pulp from making soy milk or tofu, known as a Japanese term.
It is packed with fiber, calcium, protein, and other minerals, making it a healthy ingredient for various dishes.
While fresh okara is commonly found in Japan, Korea, and China, it is not as easily available elsewhere unless you make soy milk or tofu at home.
If you are curious about using okara, check out our helpful article on "What To Do With Soya Bean Pulp," where we discuss how to cook, store, dry, and even turn it into a powder.
For more insights into okara, you can also read our post "What Is Okara?"
Can You Eat Uncooked Okara?
To know if okara is safe to eat, it is important to know where it comes from: if it was made from cooked or uncooked soybeans.
You can figure this out by understanding how it was used when making soy milk.
There are two methods of making soymilk:
- One method is to grind soaked uncooked beans, squeeze the milk from the pulp, then heat the pulp free milk for safety. The raw okara from this method requires cooking for dishes like salads but can be used in recipes that involve cooking, to ensure safety.
- The other method is to cook soaked beans in water, then grind and extract the milk from the pulp. Okara from this method is already cooked and safe for use, especially in cold dishes.
If there is any uncertainty about how it was made, it is best to cook the okara to ensure safety.
If you are using powdered okara, it has already been cooked and is safe to use in cooking.
Ingredients
Please note that below is a guide for some of the ingredients we used in the recipe. The printable recipe further down the page has the complete list of ingredients, including quantities and step-by-step instructions.
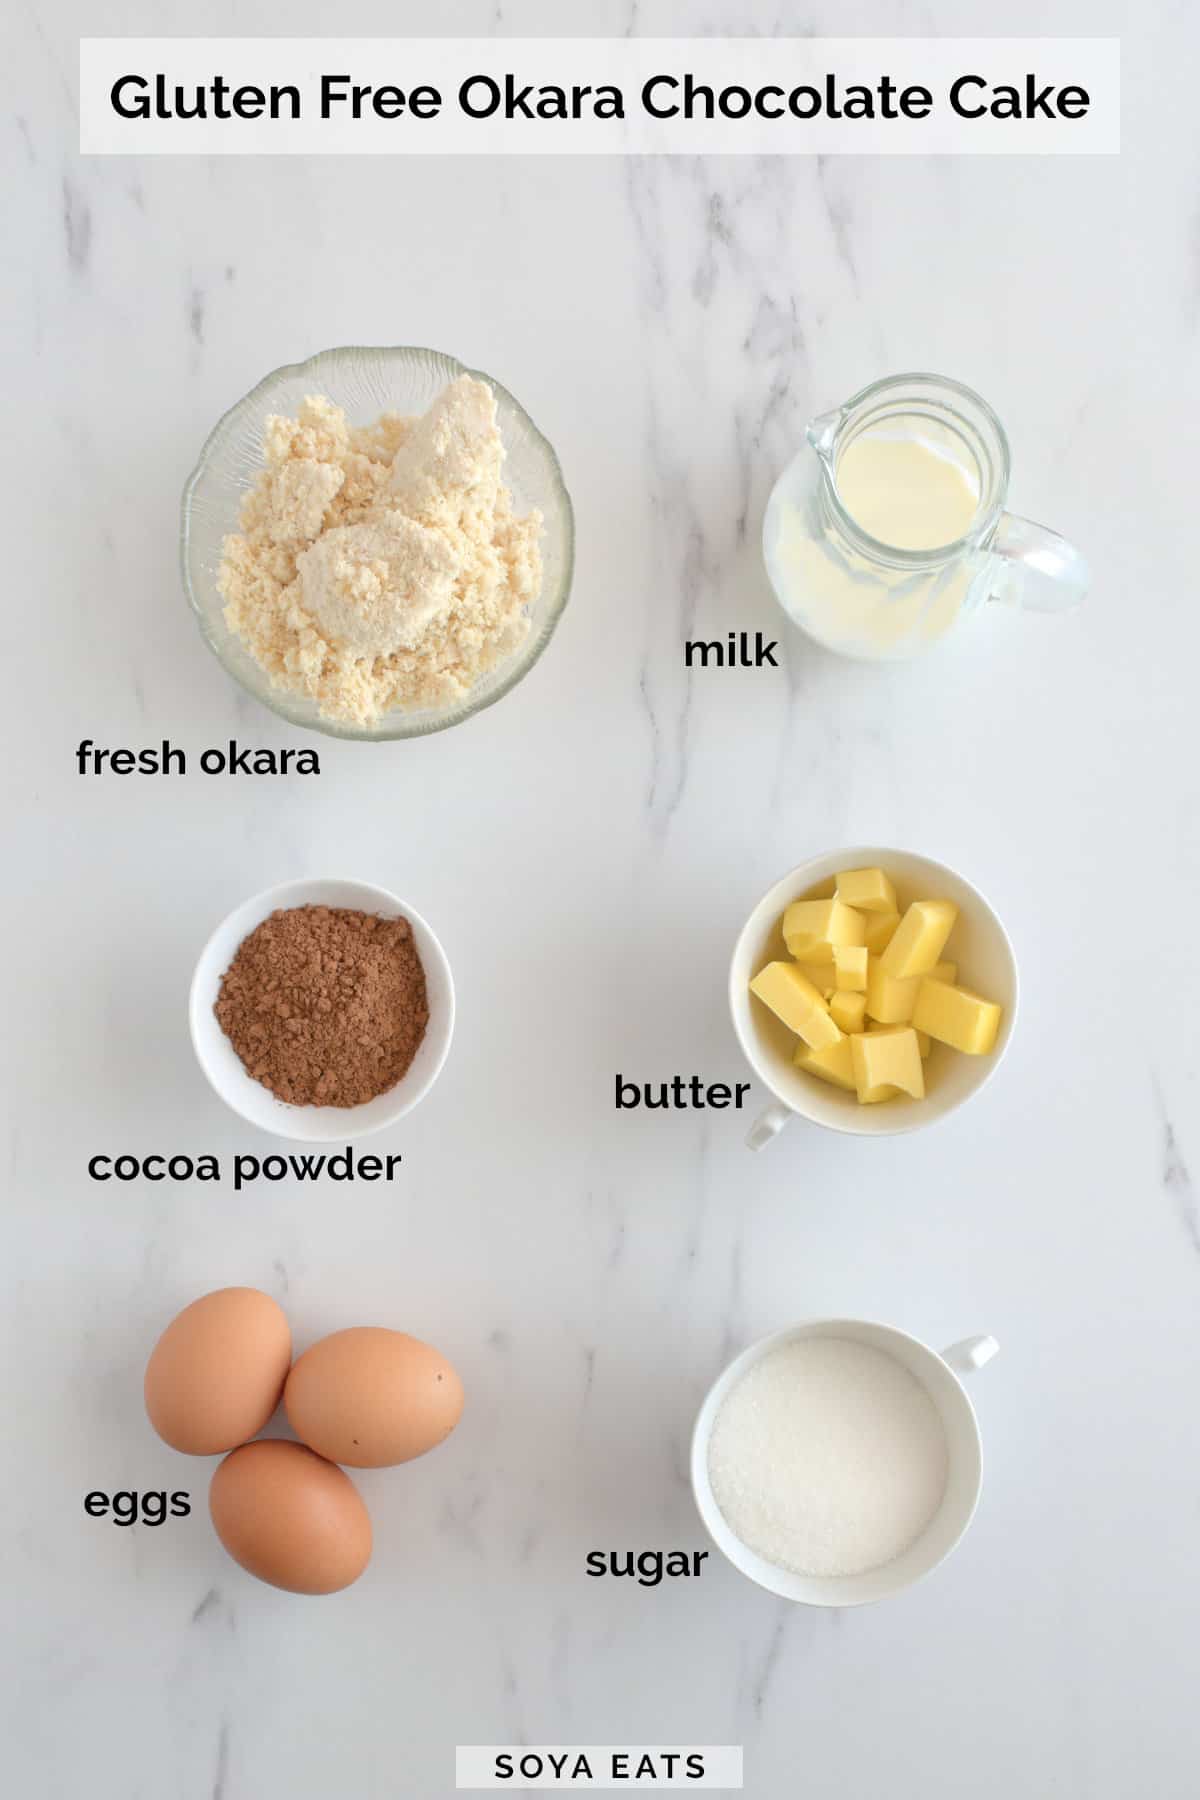
Fresh okara - you will need about ½ cup soy pulp. When making homemade soy milk, squeeze out as much milk from the soy pulp as possible. The soy pulp needs to look dry and not overly moist.
Butter - we use salted butter for this recipe, but you could use unsalted butter with a pinch of salt to enhance the flavors of the cake.
Milk - use your preferred milk, dairy, or dairy free milk like soy milk, almond milk, or coconut milk.
Egg - we use large eggs with an average weight of 56 grams (2 ounces). Use room-temperature eggs for this recipe.
Sugar - use white granulated sugar.
Cocoa powder - use unsweetened cocoa powder.
Equipment
Muffin tin
For this recipe, we used a 6-count muffin tin where each muffin hole has a ½ cup capacity.
Muffin liners
If you can, get muffin liners that are non-stick and have high sides that extend above the muffin holes, if not make your own as we do.
Don't use regular cupcake cases because the batter will fill the muffin holes to the top of the tin, so you need the high sides to stop the batter from spilling out over the top.
Here's how to make parchment paper liners with baking paper. These liners are quick to make and look nice around muffins and cupcakes.
Electric mixer
A hand-held electric mixer or stand mixer is needed to whip the eggs and sugar until light a fluffy.
Instructions
Preheat oven to 180°C (350°F).
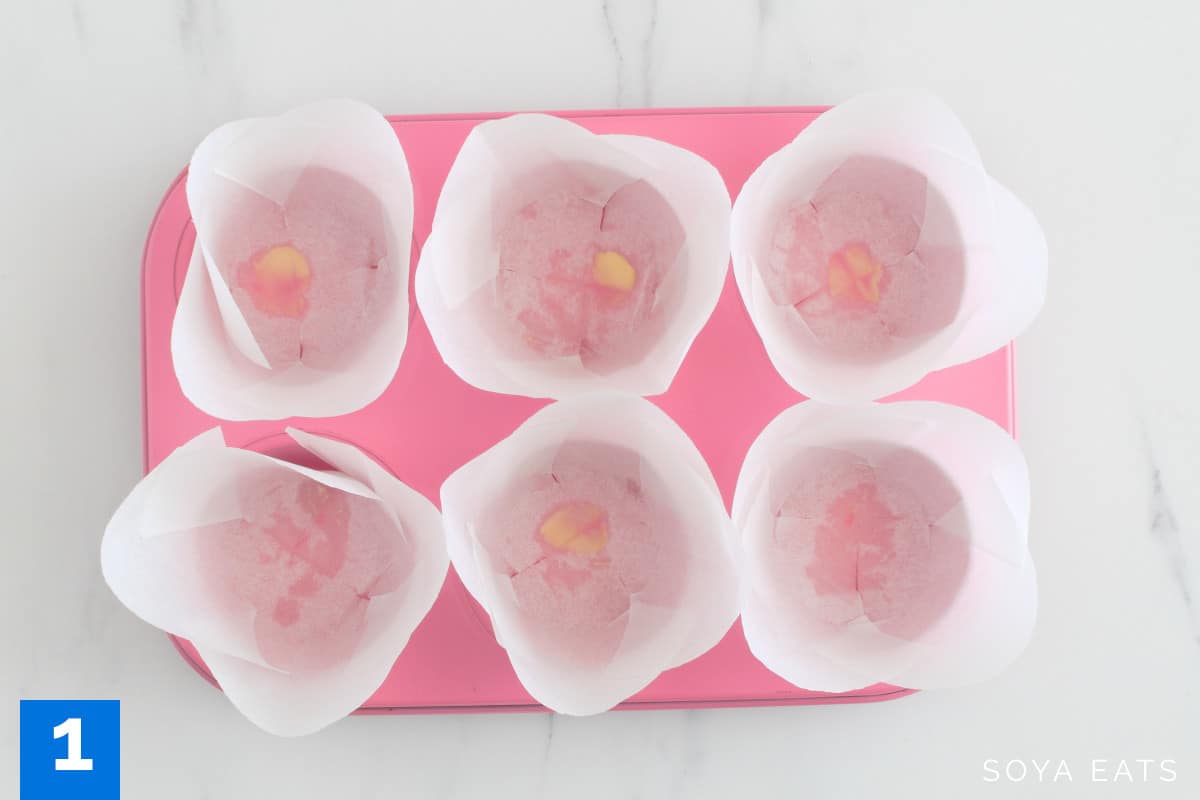
Step 1 - Line a 6-count muffin tin (½ cup hole capacity) with non-stick muffin liners with high sides- see notes below.
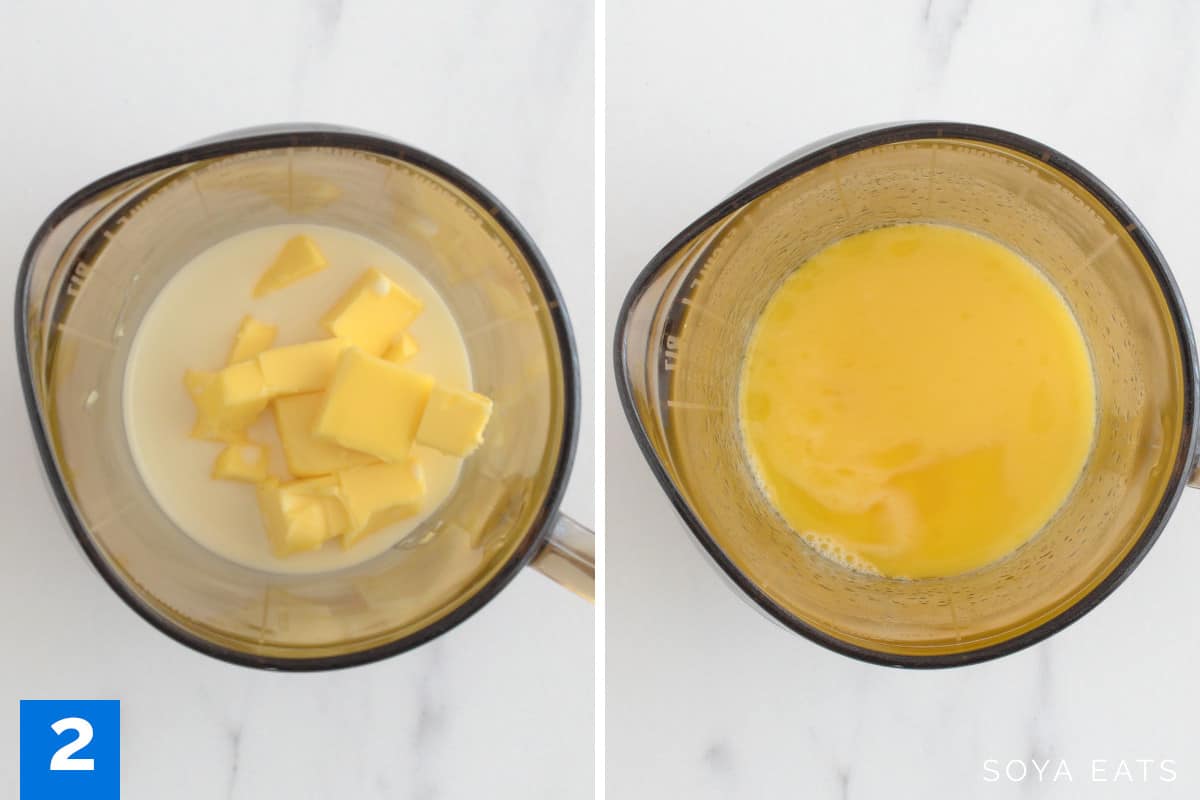
Step 2 - Place the butter and milk into a microwave-safe jug and microwave for 30 – 45 seconds to melt the butter and warm the milk.

Step 3 - Into a mixing bowl, add the okara, cocoa powder, milk, and butter and stir until well combined.
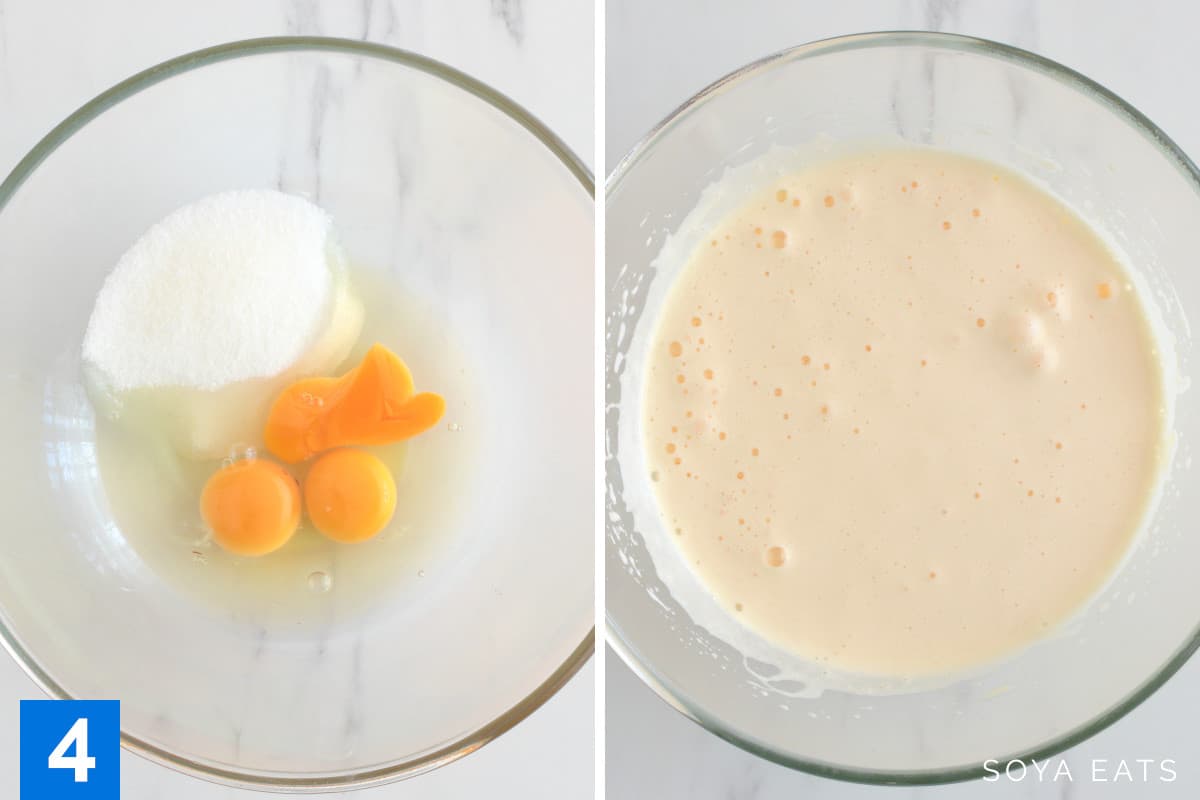
Step 4 - Place the eggs and sugar into another mixing bowl and beat with an electric mixer on high speed for about 3-5 minutes or until the mixture becomes very thick and whitish in color.
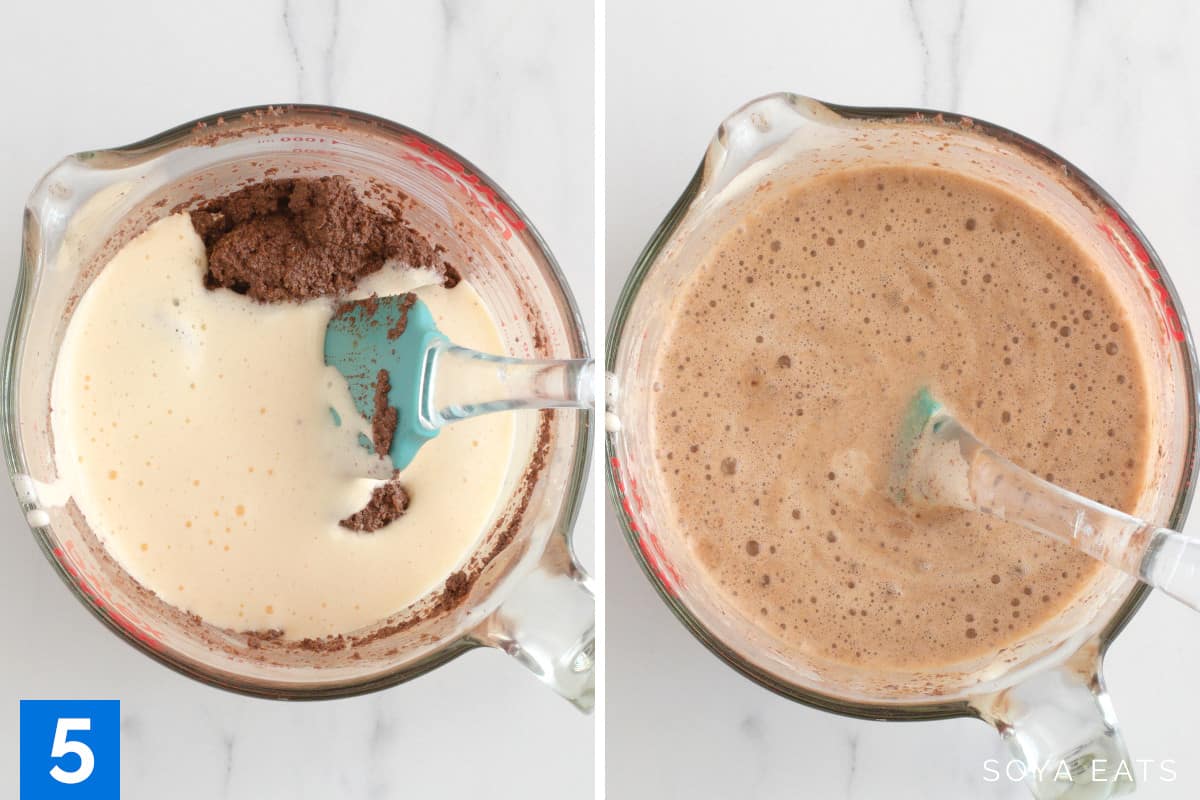
Step 5 - Add about ⅓ of the egg mixture to the okara mixture and stir with a spatula or wooden spoon until well combined. Then gently fold in the remaining egg mixture until combined.
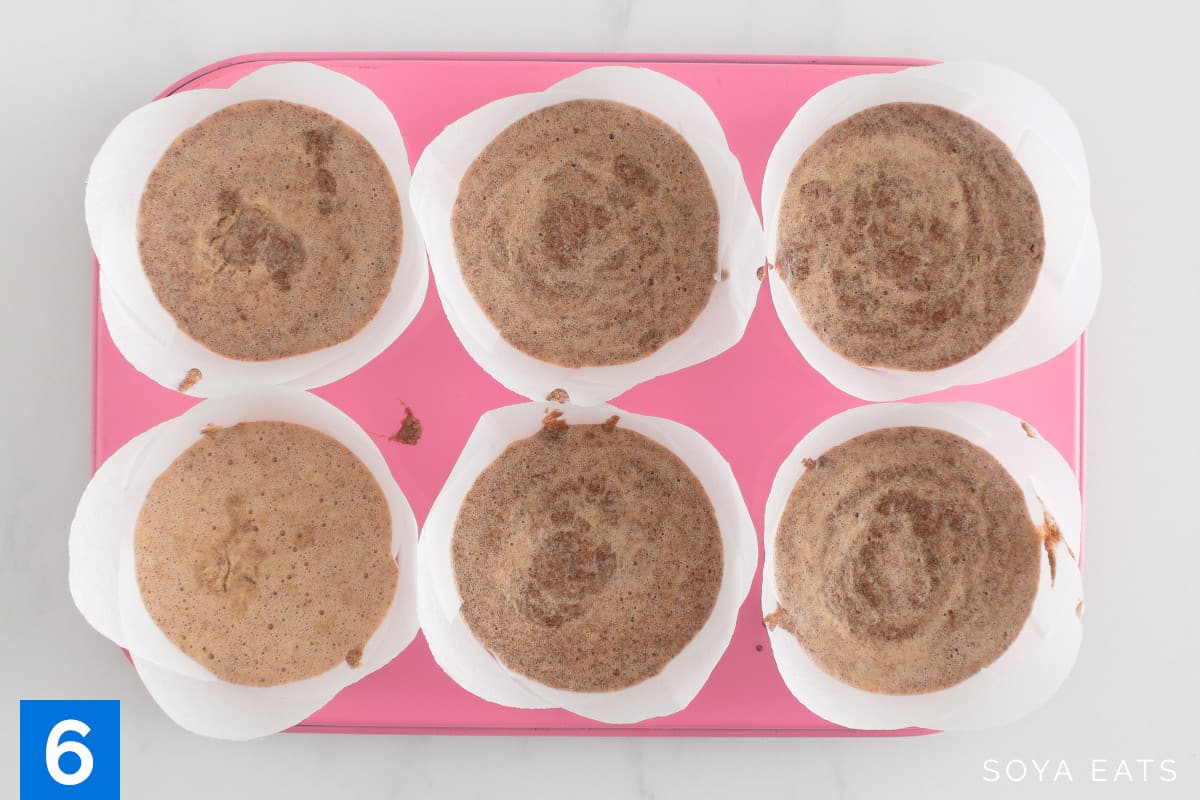
Step 6 - Pour the mixture into the prepared muffin tin, evenly filling each hole to the top. Bake for 25 - 30 minutes or until a wooden skewer inserted into the center comes out clean.
Remove from the oven and allow the cakes to stand in the tin for 10 minutes before transferring them to a wire rack to cool completely.
Recipe Tips
Muffin liners
We highly recommend making your own muffin liners with high sides for this recipe.
Why? this is because the muffin holes are filled level with the top of the tin, and the extra height the liners provide will stop the batter from spilling during baking.
Serving Size
One cupcake is a serving.
Calories Per Serve
There are about 329 calories in a single serving and 20 grams of fat and 18 grams of protein.
Serving Suggestions
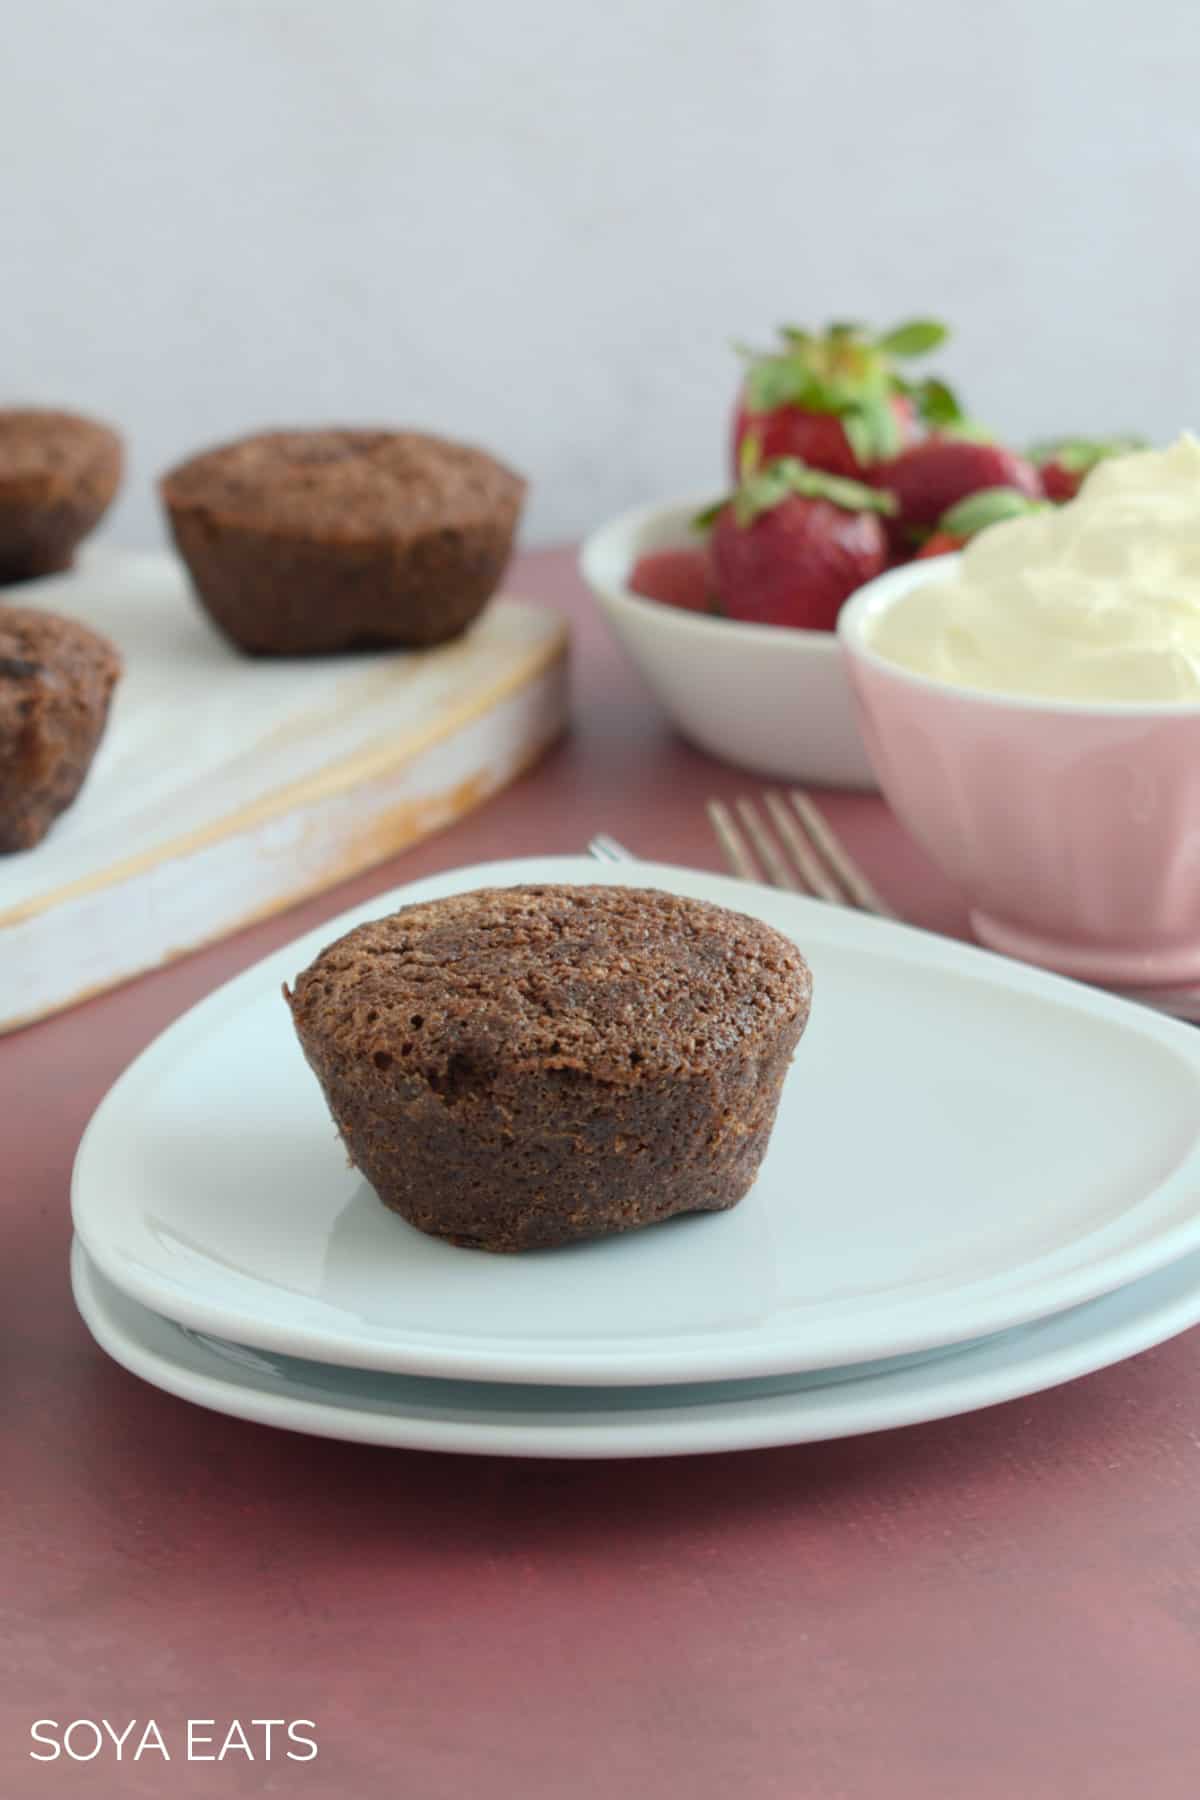
We love to serve this cake at room temperature with a light dusting of powdered sugar and a side serving of plain or flavored whipped creams like vanilla, maple syrup, or coffee.
But you could also:
- Serve the cake at room temperature with warm thick vanilla custard.
- Serve the cake warm with ice cream.
- Serve it with strawberry compote and cream.
- For a decadent dessert, you could even drizzle over a white or milk chocolate sauce.
Storage
Refrigeration – Store the cooled cake in an airtight container in the fridge for about 3-4 days.
Try not to keep it out of the fridge for more than a day because it is moist and can go moldy quickly if left at room temperature for too long.
Freezing – for longer storage, you can freeze the cake for up to three months.
When ready to serve, it can be defrosted in the fridge overnight or left to thaw on the kitchen bench several hours before serving.
Meal Prepping
These gluten-free okara chocolate cupcakes are great for meal prepping because they keep fresh for several days when stored in a sealed container in the fridge.
You can even freeze them for up to three months.
FAQ
This soya chocolate cake does not rise very much because it does not contain rising agents like baking powder or baking soda. The beaten eggs will give it a slight lift but not very much.

More Easy Recipes
If you like this recipe for gluten free okara chocolate cake you might like this gluten free dairy free orange cake, or see all our okara recipes or try these:
Recipe

Gluten Free Okara Chocolate Cake
Equipment
- 6-count muffin tin with ½ cup capacity holes
- Non-stick muffin liners with high sides- see recipe notes
- Electric mixer, hand-held or stand
Ingredients
- 50 grams (2 ounces, ¼ cup) of milk
- 50 grams (1.78 ounces) of butter
- 117 grams (4.15 ounces, ½ cup) packed fresh okara
- 25 grams (0.9 ounces, 3 level tablespoons) of unsweetened cocoa powder
- 3 large eggs room temperature
- 90 grams (3.17 ounces) of granulated white sugar
Instructions
- Preheat oven to 180°C (350°F). Line a 6-count muffin tin (½ cup hole capacity) with non-stick muffin liners with high sides- see notes below.
- Place the butter and milk into a microwave-safe jug and microwave for 30 – 45 seconds to melt the butter and warm the milk.
- Into a mixing bowl, add the okara, cocoa powder, milk, and butter and stir until well combined.
- Place the eggs and sugar into another mixing bowl and beat with an electric mixer on high speed for about 3-5 minutes or until the mixture becomes thick and whitish in color.
- Add about ⅓ of the egg mixture to the okara mixture and stir with a spatula or wooden spoon until well combined. Then gently fold in the remaining egg mixture until combined.
- Pour the mixture into the prepared muffin tin, evenly filling each hole to the top. Bake for 25 - 30 minutes or until a wooden skewer inserted into the center comes out clean.
- Remove from the oven and allow the cakes to stand in the tin for 10 minutes before transferring them to a wire rack to cool completely.


Tozi Prossie says
Thanks so much at least for once there’s something that I am compatible with.... the Vanilla cake was awesome